前言
javaWeb基础学习
正文
遇到的问题
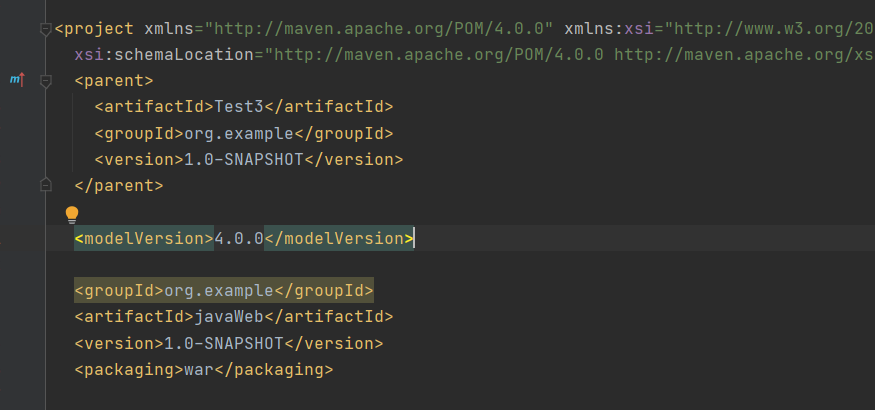
IDEA创建Maven多模块项目子模块引用不到父模块的pom
个人觉得可能是IDEA的问题,网上说自行修改子项目的pom
1
2
3
4
5
| <parent>
<artifactId>Test3</artifactId>
<groupId>org.example</groupId>
<version>1.0-SNAPSHOT</version>
</parent>
|
Maven中导入依赖,去仓库搜索需要的依赖
1
| https://mvnrepository.com/
|
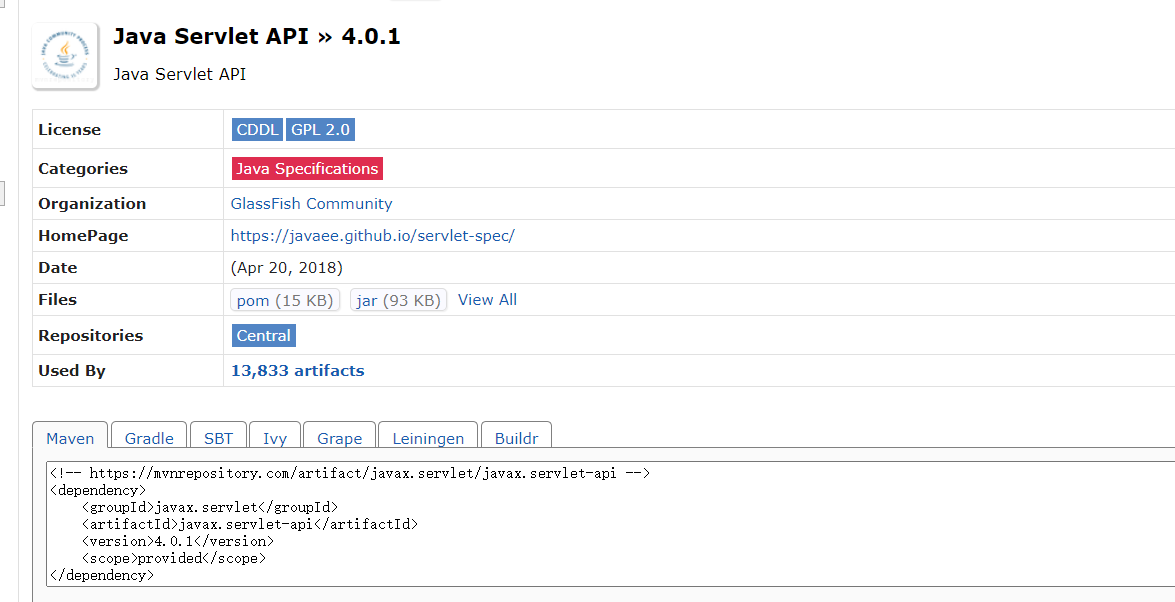
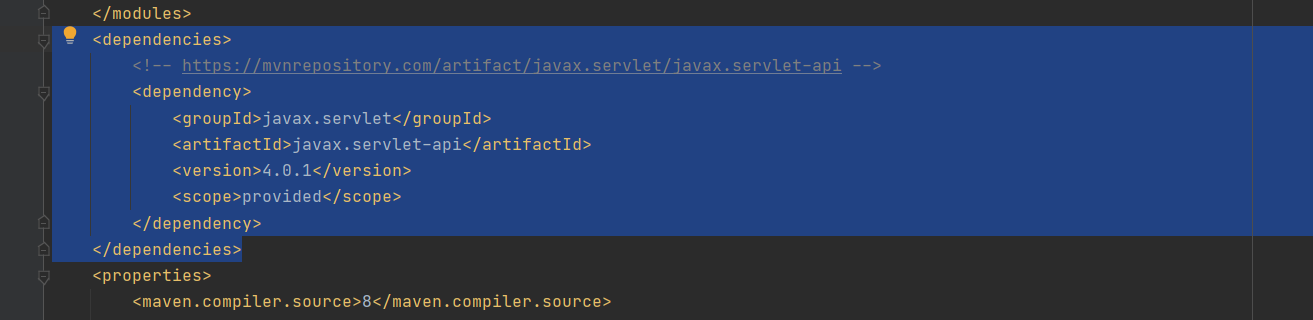
在父项目中的pom中
1
2
3
4
5
6
7
8
9
| <dependencies>
<dependency>
<groupId>javax.servlet</groupId>
<artifactId>javax.servlet-api</artifactId>
<version>4.0.1</version>
<scope>provided</scope>
</dependency>
</dependencies>
|
创建的webapp中的web-xml修改成如下:(这个内容去tomcat的ROOT目录下提取)
1
2
3
4
5
6
7
8
9
10
11
12
| <?xml version="1.0" encoding="UTF-8"?>
<web-app xmlns="http://xmlns.jcp.org/xml/ns/javaee"
xmlns:xsi="http://www.w3.org/2001/XMLSchema-instance"
xsi:schemaLocation="http://xmlns.jcp.org/xml/ns/javaee
http://xmlns.jcp.org/xml/ns/javaee/web-app_3_1.xsd"
version="3.1"
metadata-complete="true">
</web-app>
|
Maven资源导出问题
在当前项目中放入如下build
1
2
3
4
5
6
7
8
9
10
11
12
13
14
15
16
17
18
19
20
|
<build>
<resources>
<resource>
<directory>src/main/resources</directory>
<includes>
<include>**/*.properties</include>
<include>**/*.xml</include>
</includes>
</resource>
<resource>
<directory>src/main/java</directory>
<includes>
<include>**/*.properties</include>
<include>**/*.xml</include>
</includes>
<filtering>true</filtering>
</resource>
</resources>
</build>
|
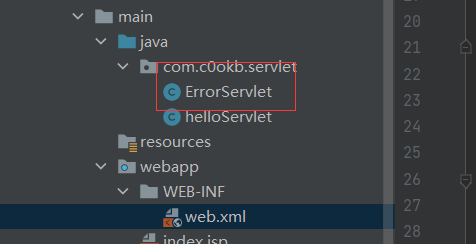
编写一个简单Servlet类
1
2
3
4
5
6
7
8
9
10
11
12
13
14
15
16
17
18
19
20
21
| package com.c0okb.servlet;
import javafx.print.Printer;
import javax.servlet.ServletException;
import javax.servlet.http.HttpServlet;
import javax.servlet.http.HttpServletRequest;
import javax.servlet.http.HttpServletResponse;
import java.io.IOException;
import java.io.PrintWriter;
public class helloServlet extends HttpServlet {
@Override
protected void doGet(HttpServletRequest req, HttpServletResponse resp) throws ServletException, IOException {
PrintWriter writer = resp.getWriter();
writer.print("Hello,servlet");
}
}
|
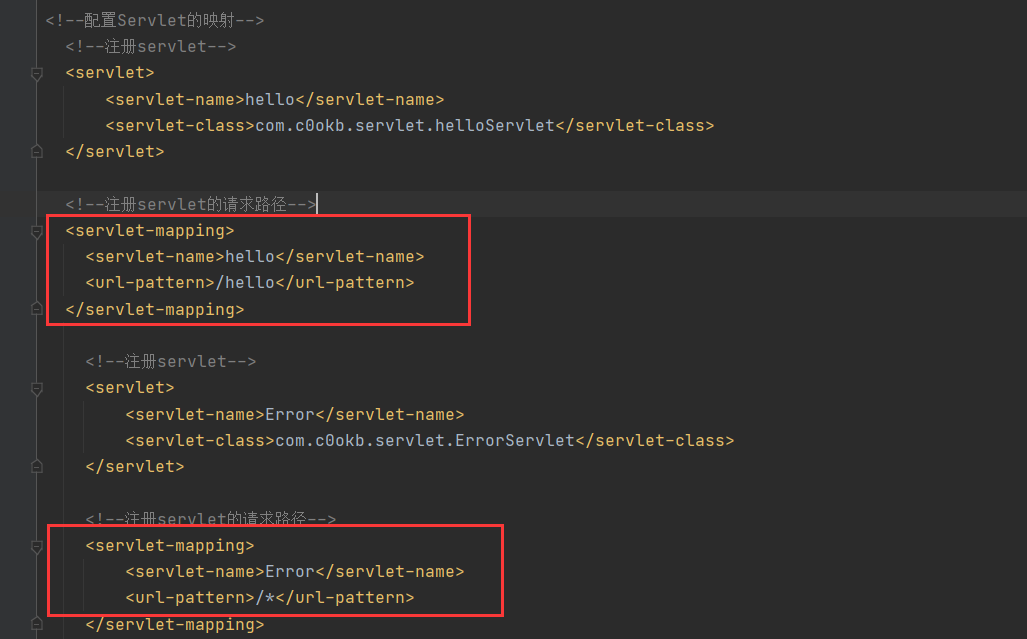
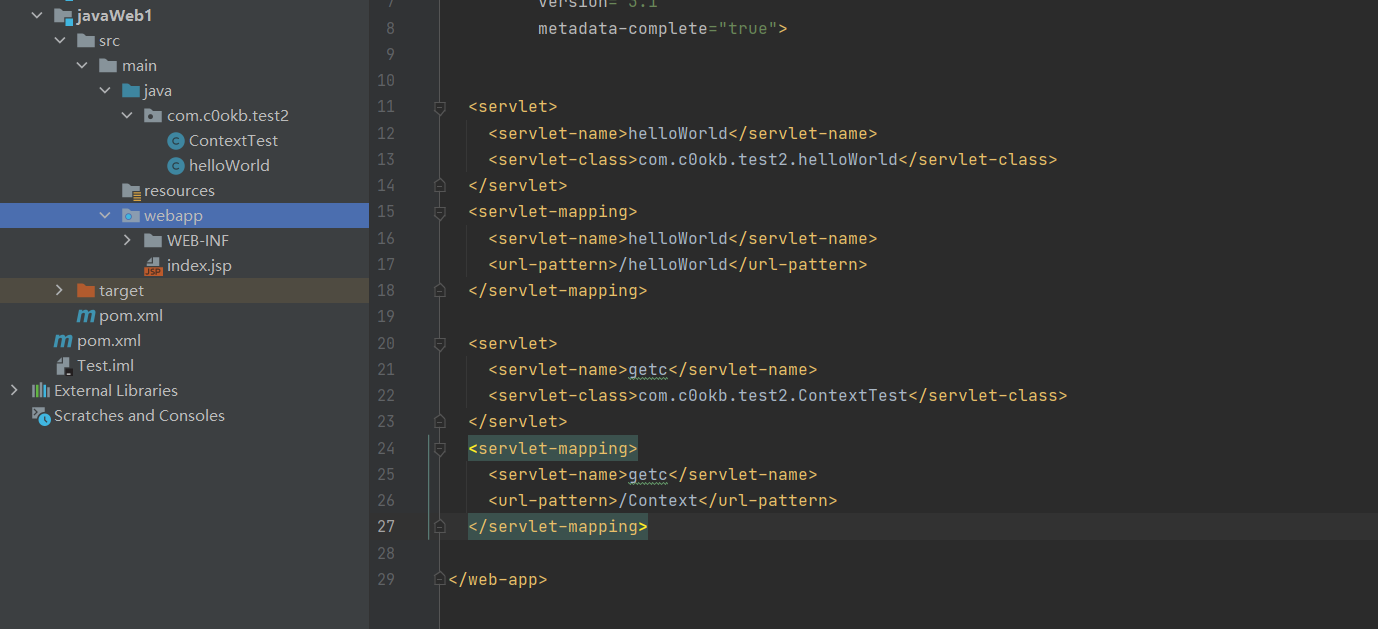
(5)编写Servlet映射
1
2
3
4
5
6
7
8
9
10
11
12
13
14
|
<servlet>
<servlet-name>hello</servlet-name>
<servlet-class>com.c0okb.servlet.helloServlet</servlet-class>
</servlet>
<servlet-mapping>
<servlet-name>hello</servlet-name>
<url-pattern>/hello</url-pattern>
</servlet-mapping>
</web-app>
|
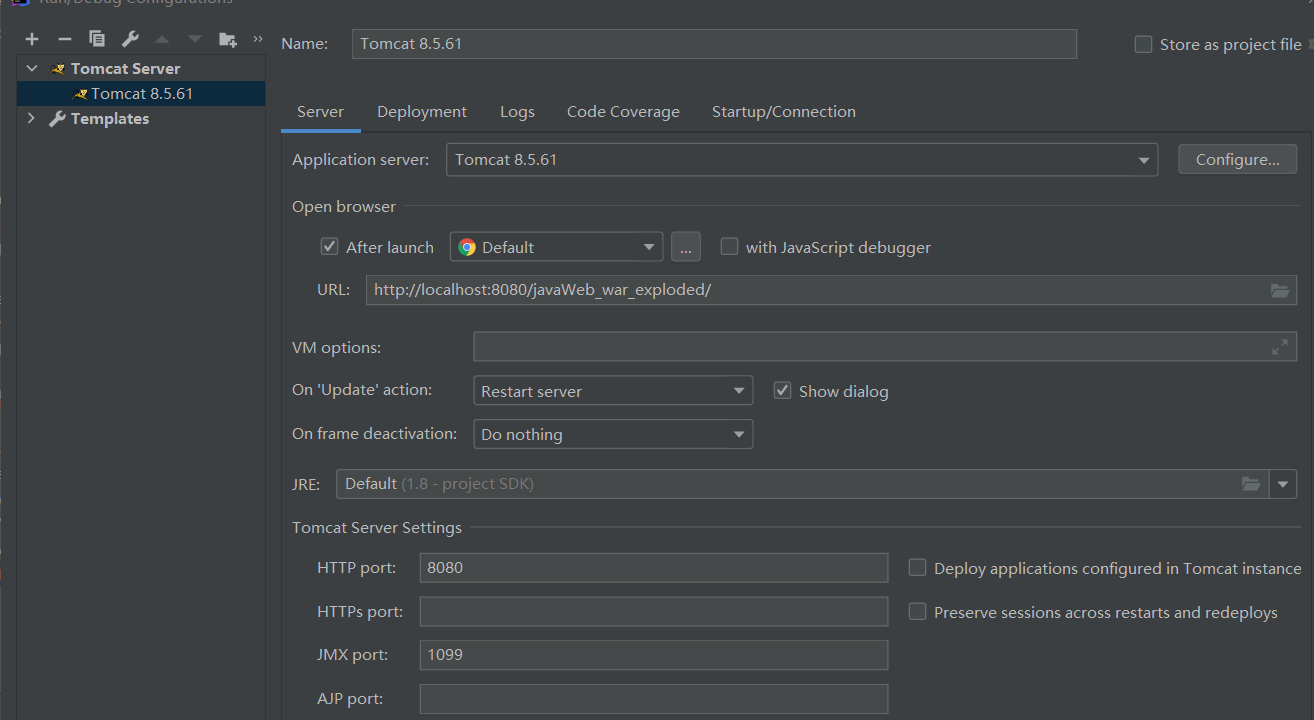
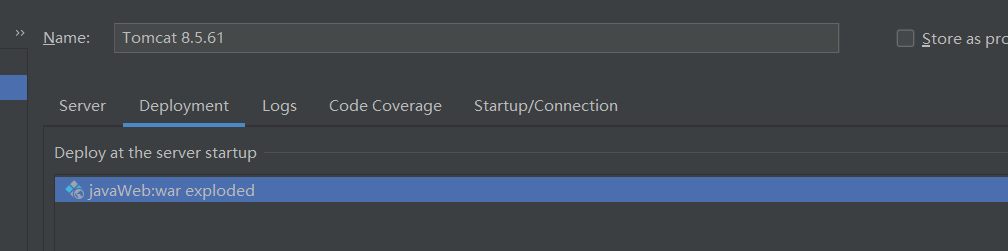
配置好Tomcat

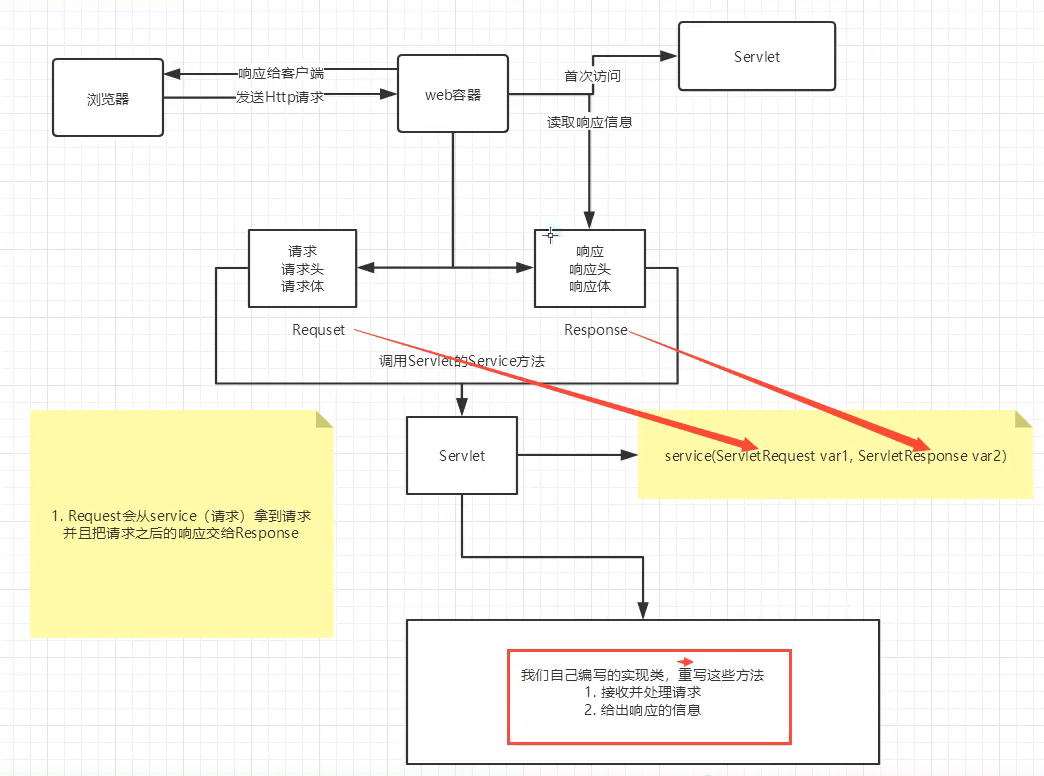
Servlet的运行原理
Servlet是由Web服务器调用,web服务器在收到浏览器之后,会:
Servlet-Mapping问题
1、一个Servlet可以指定一个映射路径
2、一个Servlet可以指定多个映射路径
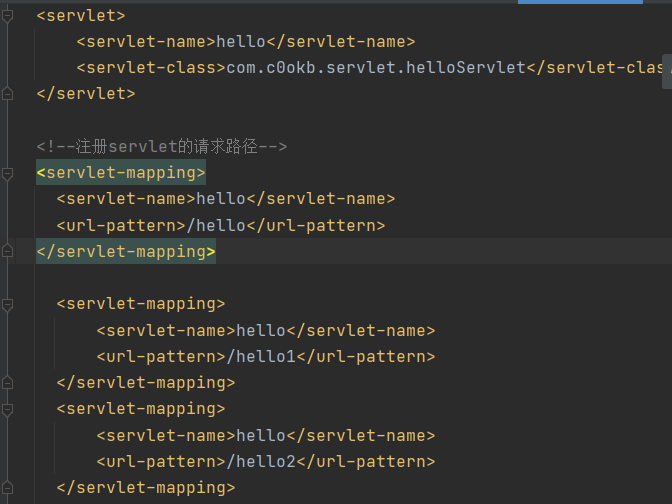
3、一个Servlet可以指定通用映射路径
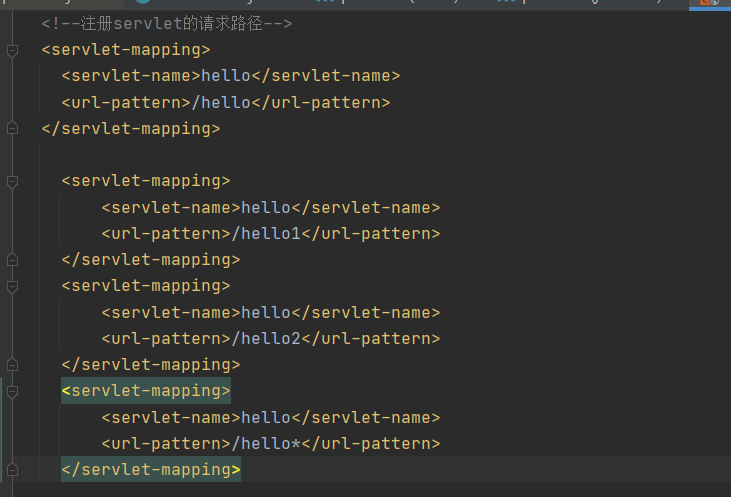
4、加指定后缀或前缀
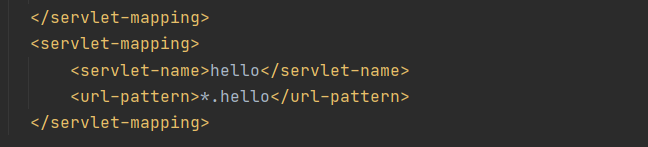
5、优先级问题
指定固有的映射路径优先级最高,如果找不到就会走默认的处理请求;
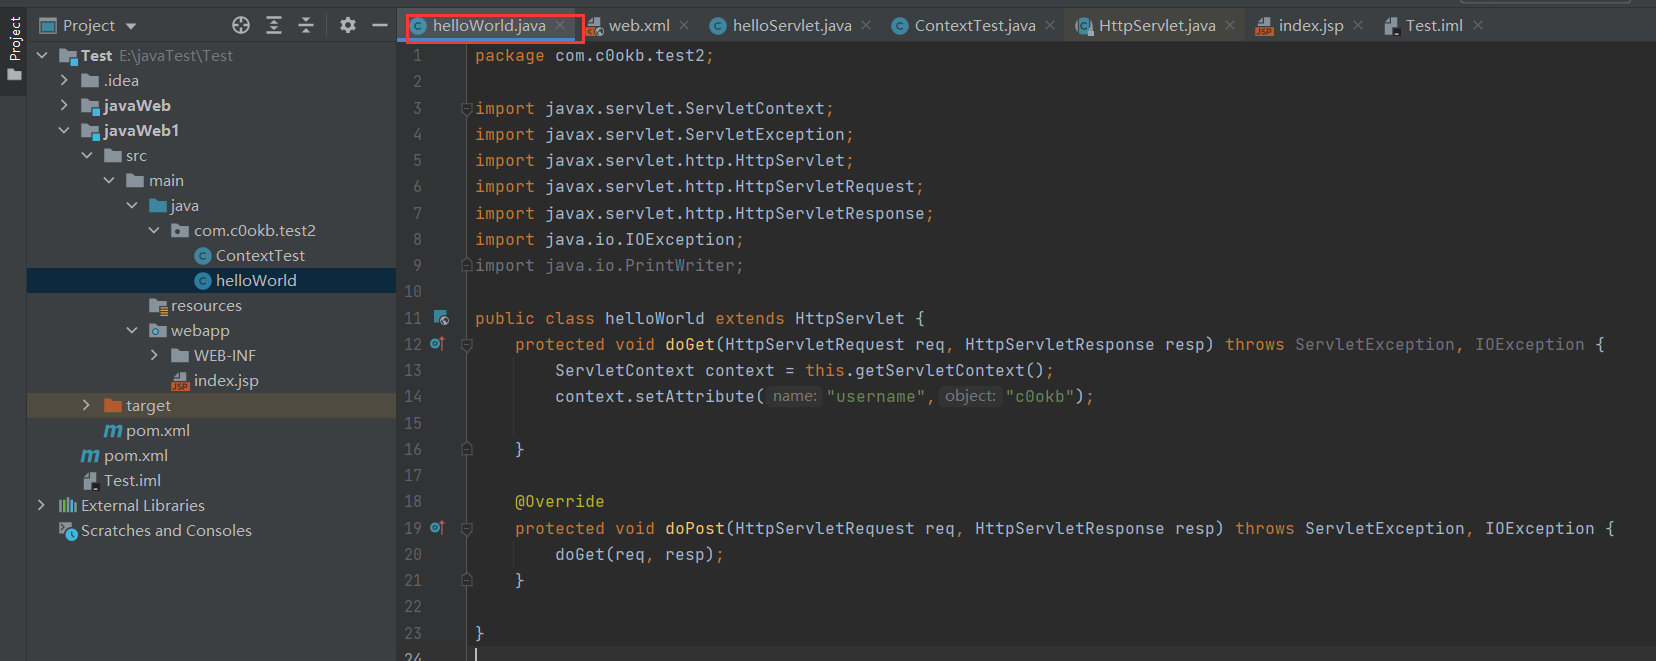
ServletContext对象
ServletContext的作用凌驾于该Web应用的所有Servlet之上。web容器在启动时,它会为每一个web程序都创建一个对应的ServletContext对象,它代表了当前的Web应用。
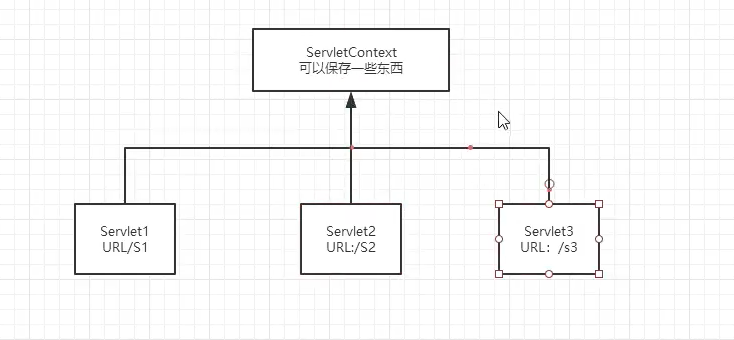
其作用一:数据共享
Servlet1放入ServletContext的数据,Servlet2能够调用该数据,体现数据共享
例子:
1
2
3
4
5
6
7
8
| protected void doGet(HttpServletRequest req, HttpServletResponse resp) throws ServletException, IOException {
ServletContext servletContext = this.getServletContext();
String username = (String) servletContext.getAttribute("username");
resp.setContentType("text/html");
resp.setCharacterEncoding("utf-8");
PrintWriter writer = resp.getWriter();
writer.print("username is:"+username);
}
|

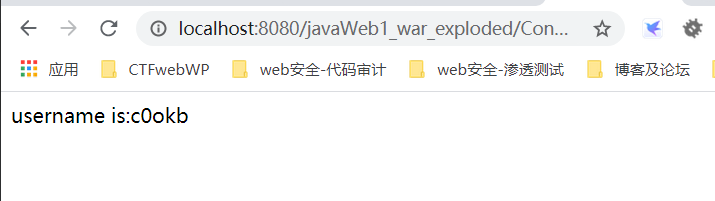
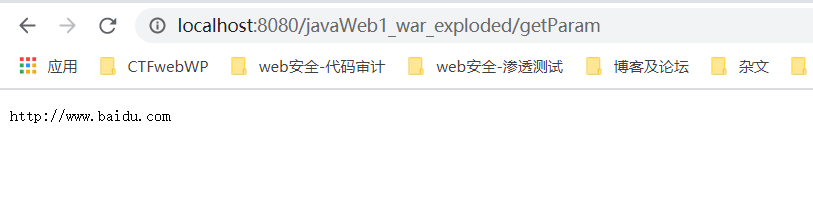
然后其运行结果
访问
1
| http://localhost:8080/javaWeb1_war_exploded/helloWorld
|
将生成username:cookie存入ServletContext
然后访问
1
| http://localhost:8080/javaWeb1_war_exploded/Context
|
其作用二:获取初始化参数
例子:
在web.xml中写入
1
2
3
4
| <context-param>
<param-name>url</param-name>
<param-value>http://www.baidu.com</param-value>
</context-param>
|
创建一个测试类
1
2
3
4
5
6
7
8
9
10
11
12
13
14
15
16
17
18
19
20
21
22
23
24
| package com.c0okb.test2;
import javax.servlet.ServletContext;
import javax.servlet.ServletException;
import javax.servlet.http.HttpServlet;
import javax.servlet.http.HttpServletRequest;
import javax.servlet.http.HttpServletResponse;
import java.io.IOException;
import java.io.PrintWriter;
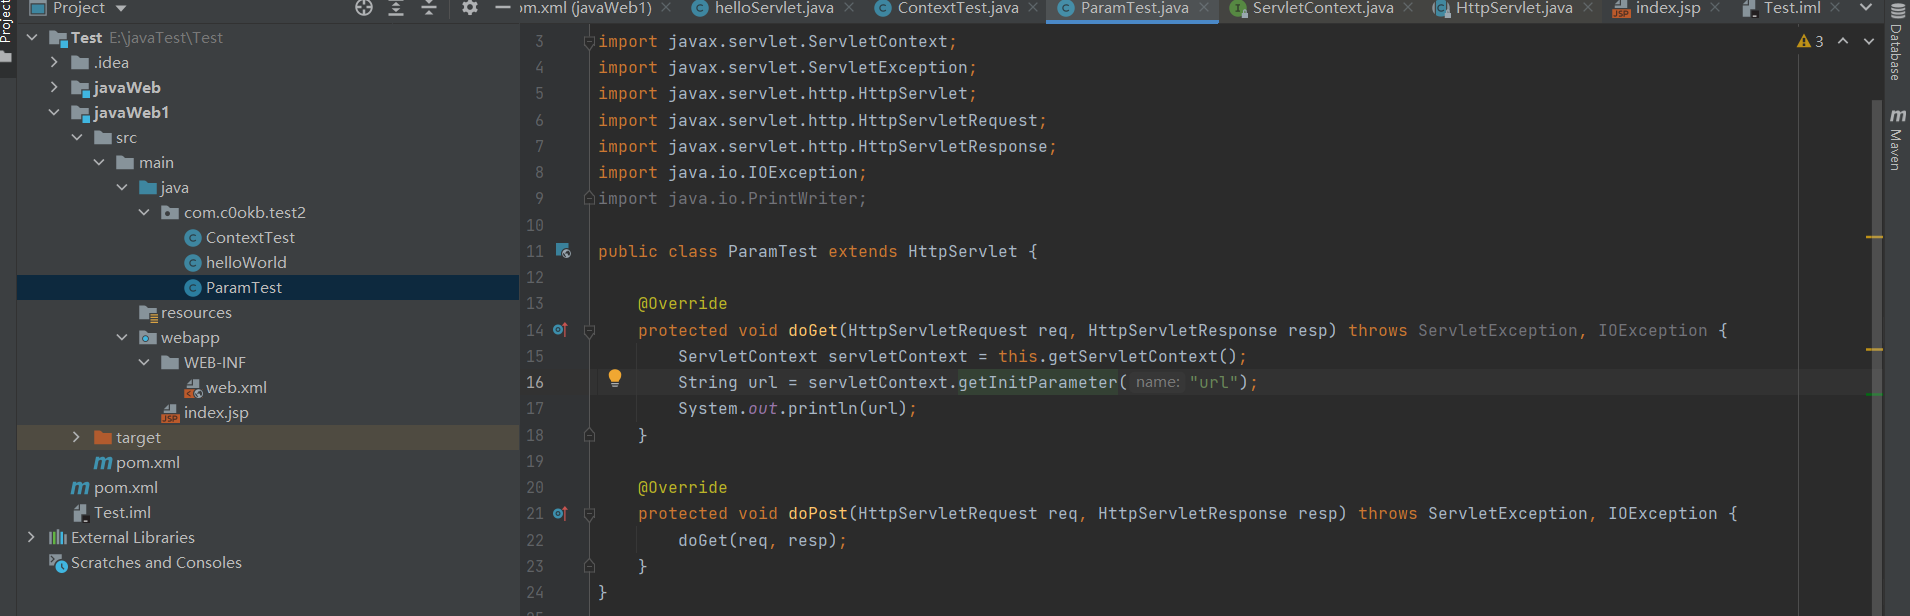
public class ParamTest extends HttpServlet {
@Override
protected void doGet(HttpServletRequest req, HttpServletResponse resp) throws ServletException, IOException {
ServletContext servletContext = this.getServletContext();
String url = servletContext.getInitParameter("url");
System.out.println(url);
}
@Override
protected void doPost(HttpServletRequest req, HttpServletResponse resp) throws ServletException, IOException {
doGet(req, resp);
}
}
|
其中
1
2
3
4
5
| protected void doGet(HttpServletRequest req, HttpServletResponse resp) throws ServletException, IOException {
ServletContext servletContext = this.getServletContext();
String url = servletContext.getInitParameter("url");
System.out.println(url);
}
|
在web.xml中注册Servlet
1
2
3
4
5
6
7
8
| <servlet>
<servlet-name>getParam</servlet-name>
<servlet-class>com.c0okb.test2.ParamTest</servlet-class>
</servlet>
<servlet-mapping>
<servlet-name>getParam</servlet-name>
<url-pattern>/getParam</url-pattern>
</servlet-mapping>
|
其作用三:请求转发
代码:
1
2
3
4
| protected void doGet(HttpServletRequest req, HttpServletResponse resp) throws ServletException, IOException {
ServletContext servletContext = this.getServletContext();
servletContext.getRequestDispatcher("/getParam").forward(req,resp);
}
|
注册Servlet
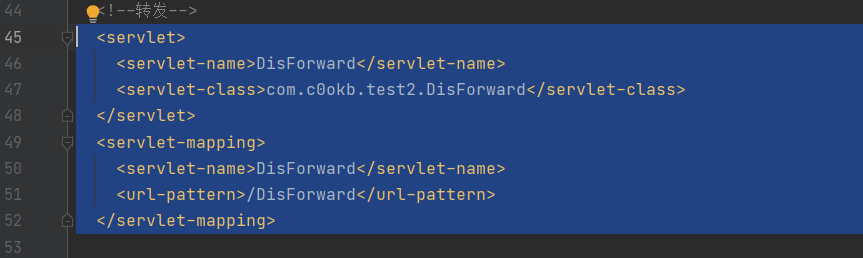
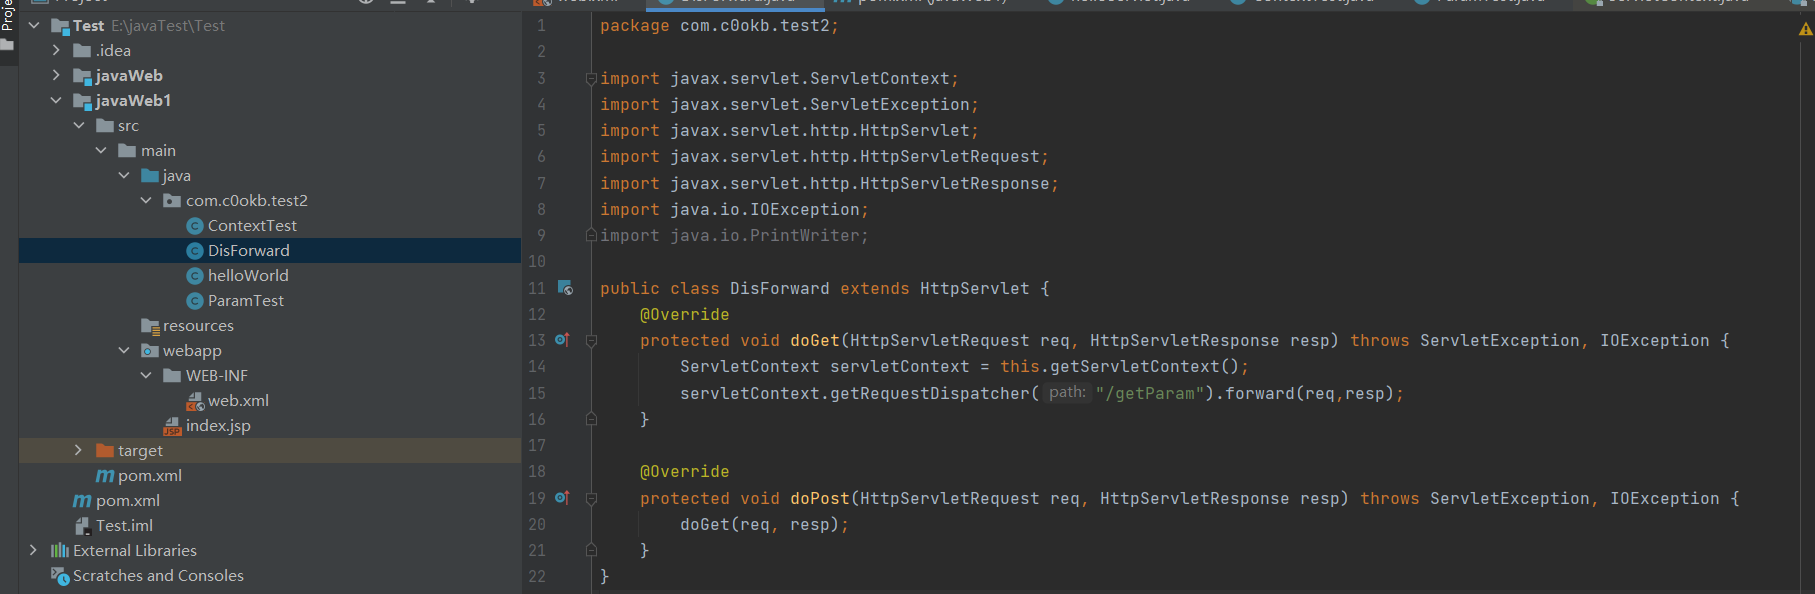
当访问/DisForward时,该请求将会被转发至/getParam
其作用四:读取资源文件 (常用)
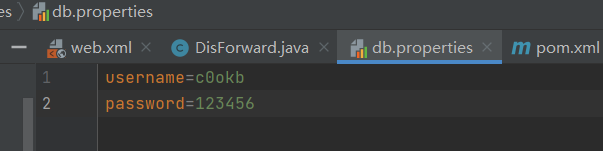
读取properties
1
2
3
4
5
6
7
8
9
10
11
12
13
14
| protected void doGet(HttpServletRequest req, HttpServletResponse resp) throws IOException {
ServletContext servletContext = this.getServletContext();
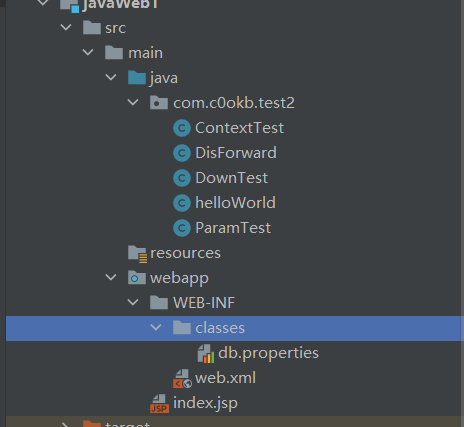
InputStream is = servletContext.getResourceAsStream("/WEB-INF/classes/db.properties");
Properties prop = new Properties();
prop.load(is);
String username = prop.getProperty("username");
String password = prop.getProperty("password");
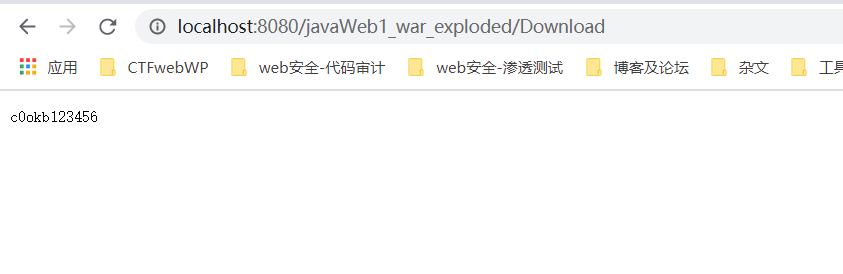
resp.getWriter().print(username);
resp.getWriter().print(password);
}
|

效果:
HttpServletResponse
web服务器接收到客户端的Http请求,针对这个请求,分别创建一个代表请求的HttpServletRequest对象,代表响应的一个HttpServletResponse;
·如果要获取客户端请求过来的参数:找HttpServletRequest
·如果要给客户端响应一些信息:找HttpServletResponse
下载文件
1
2
3
4
5
6
7
8
9
10
11
12
13
14
15
16
17
18
19
20
21
22
23
24
25
26
27
28
29
30
31
32
33
34
35
36
37
38
39
40
41
42
43
44
45
46
47
48
49
| package com.c0okb.test2;
import jdk.internal.util.xml.impl.Input;
import javax.servlet.ServletException;
import javax.servlet.ServletOutputStream;
import javax.servlet.http.HttpServlet;
import javax.servlet.http.HttpServletRequest;
import javax.servlet.http.HttpServletResponse;
import java.io.FileInputStream;
import java.io.IOException;
import java.io.InputStream;
import java.io.OutputStream;
import java.net.URLEncoder;
public class DownloadFile extends HttpServlet {
private static final long serialVersionUID = 1L;
@Override
protected void doGet(HttpServletRequest req, HttpServletResponse resp) throws ServletException, IOException {
String path = "E:\\javaTest\\Test\\javaWeb1\\Download\\test.jpg";
System.out.println("文件下载的路径"+path);
String filename = path.substring(path.lastIndexOf("\\")+1);
System.out.println(filename);
resp.setHeader("Content-Disposition", "attachment;filename="+ URLEncoder.encode(filename,"UTF-8"));
InputStream in = null;
OutputStream out = null;
try{
in = new FileInputStream(path);
int len = 0;
byte buffer[] = new byte[1024];
ServletOutputStream ServletOut = resp.getOutputStream();
while ((len=in.read(buffer))!=-1){
ServletOut.write(buffer,0,len);
}
} catch (Exception e){
e.printStackTrace();
}finally {
if(in != null){
in.close();
}
}
}
@Override
protected void doPost(HttpServletRequest req, HttpServletResponse resp) throws ServletException, IOException {
doPost(req, resp);
}
}
|
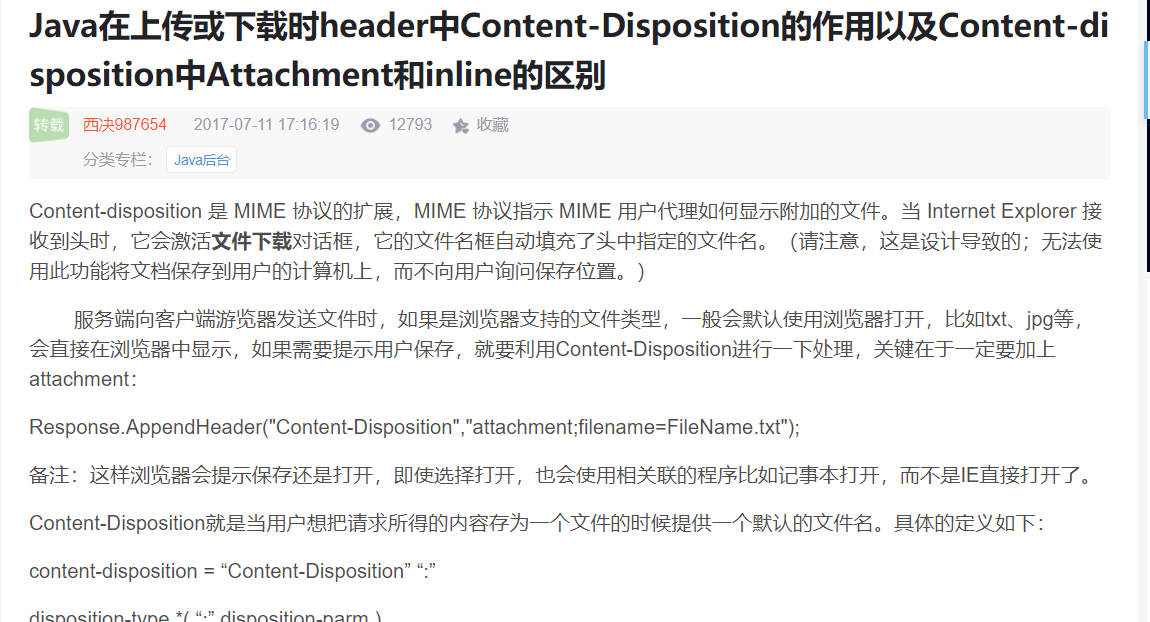
详细参考:Java在上传或下载时header中Content-Disposition的作用以及Content-disposition中Attachment和inline的区别
1
2
3
4
5
6
7
8
9
10
11
12
13
14
15
16
17
18
| 1.要获取下载文件的路径
String path = "E:\\javaTest\\Test\\javaWeb1\\Download\\test.jpg";
System.out.println("文件下载的路径"+path);
2.下载的文件名是啥?
String filename = path.substring(path.lastIndexOf("\\")+1);
System.out.println(filename);
3.设置想办法让浏览器能够支持下截我们需要的东西
resp.setHeader("Content-Disposition", "attachment;filename="+ URLEncoder.encode(filename,"UTF-8"));
4、获取下载文件的输入流
in = new FileInputStream(path);
5.创建缓冲区
int len = 0;
byte buffer[] = new byte[1024];
6.获取OutputStream对象
ServletOutputStream ServletOut = resp.getOutputStream();
7.将FileOutputStream流写入到buffer缓冲区,使用OutputStream将缓冲区中的数据输出到客户端
while ((len=in.read(buffer))!=-1){
ServletOut.write(buffer,0,len);}
|
生成验证码
1
2
3
4
5
6
7
8
9
10
11
12
13
14
15
16
17
18
19
20
21
22
23
24
25
26
27
28
29
30
31
32
33
34
35
36
37
38
39
40
41
42
43
44
45
46
47
48
49
50
| package com.c0okb.test2;
import javax.imageio.ImageIO;
import javax.servlet.ServletException;
import javax.servlet.http.HttpServlet;
import javax.servlet.http.HttpServletRequest;
import javax.servlet.http.HttpServletResponse;
import java.awt.*;
import java.awt.image.BufferedImage;
import java.io.IOException;
import java.util.Random;
public class ImageServlet extends HttpServlet {
@Override
protected void doGet(HttpServletRequest req, HttpServletResponse resp) throws ServletException, IOException {
resp.setHeader("refresh","3");
BufferedImage bufferedImage = new BufferedImage(80,20,BufferedImage.TYPE_INT_RGB);
Graphics2D g = (Graphics2D) bufferedImage.getGraphics();
g.setColor(Color.white);
g.fillRect(0,0,80,20);
g.setColor(Color.BLUE);
g.setFont(new Font(null,Font.BOLD,20));
g.drawString(random(),0,20);
resp.setContentType("image/png");
ImageIO.write(bufferedImage,"jpg",resp.getOutputStream());
}
private String random(){
String str = "ABCDEFGHIJKLMNOPQRSTUVWXYZabcdefghijklmnopqrstuvwxyz0123456789";
StringBuilder sb = new StringBuilder(6);
for(int i=0;i<6;i++){
char ch = str.charAt(new Random().nextInt(str.length()));
sb.append(ch);
}
return sb.toString();
}
@Override
protected void doPost(HttpServletRequest req, HttpServletResponse resp) throws ServletException, IOException {
doGet(req, resp);
}
}
|
重定向
重定向是指当浏览器向Tomcat服务器发送请求时,由于一个Servlet1类无法完成所有请求响应工作,这时候Servlet1类会通知浏览器重新定向到另一个Servlet2类。浏览器再次发送请求Servlet2,来获得Servlet2的响应。
重定向和转发的相同点和不同点
相同点:页面会实现跳转
不同点:请求转发的时候,url不会产生变化;重定向,url会发生变化
小demo一下:
注册Servlet
1
2
3
4
5
6
7
8
| <servlet>
<servlet-name>Login</servlet-name>
<servlet-class>com.c0okb.test2.LoginServlet</servlet-class>
</servlet>
<servlet-mapping>
<servlet-name>Login</servlet-name>
<url-pattern>/Login</url-pattern>
</servlet-mapping>
|
1
2
3
4
5
6
7
8
9
10
11
12
13
14
15
16
17
18
19
20
21
22
23
24
25
26
27
28
29
30
31
32
33
| package com.c0okb.test2;
import javax.servlet.http.HttpServlet;
import javax.servlet.http.HttpServletRequest;
import javax.servlet.http.HttpServletResponse;
import java.io.IOException;
public class LoginServlet extends HttpServlet {
@Override
protected void doGet(HttpServletRequest req, HttpServletResponse resp) throws IOException {
System.out.println("进入方法");
req.setCharacterEncoding("utf-8");
resp.setContentType("text/html,charset=utf-8");
String username = req.getParameter("username");
String password = req.getParameter("password");
if(("admin").equals(username)&&("root").equals(password)){
System.out.println("进入welcome方法");
resp.sendRedirect("/javaWeb1_war_exploded/welcome.jsp");
}else{
System.out.println("进入index方法");
resp.sendRedirect("/javaWeb1_war_exploded/index.jsp");
}
}
@Override
protected void doPost(HttpServletRequest req, HttpServletResponse resp) throws IOException {
doGet(req, resp);
}
}
|
1
2
3
4
5
6
7
8
9
10
11
12
13
14
15
16
17
18
| <%index.jsp%>
<!DOCTYPE html>
<html>
<head>
<meta charset="UTF-8">
<title>Insert title here</title>
</head>
<body>
<form action="${pageContext.request.contextPath}/Login" method="get">
username:<input type="text" name="username"><br>
password:<input type="password" name="password"><br>
<input type="submit" value="submit">
</form>
</body>
</html>
|
1
2
3
4
5
6
7
8
9
10
11
12
13
| <%welcome.jsp%>
<!DOCTYPE html>
<html>
<head>
<meta charset="UTF-8">
<title>Insert title here</title>
</head>
<body>
welcome
</body>
</html>
|